If you're a NULS 1.0 Agent Node operator, or you've got a NULS 1.0 wallet or private key, and aren't sure what to do in order to get going on the NULS 2.0 network, this guide is for you! We'll step you through exporting your private keys from your NULS 1.0 wallet or node, installing the NULS 2.0 wallet software, and importing your private keys, then starting up your NULS 2.0 node.
This guide is written for Windows wallets and Linux nodes. If you use other versions of the NULS software, the steps should be similar but will differ slightly based on what's required in your OS.
If you need additional support on this guide, drop us a line on our Technical Support channel in our Discord.
Phase 1 - Backing up your NULS 1.0 Wallet Private Keys
Phase 1 will help you back up your NULS 1.0 private keys for import into a NULS 2.0 wallet. If you do not have a NULS 1.0 wallet, you can skip phase 1 and go straight to Phase 3.
| Step | Image |
|---|
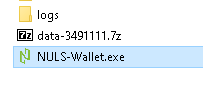
Open your NULS 1.0 Wallet If your NULS is stored on a 1.0 wallet on your PC, you'll need to get a backup of your private keys to import your NULS into your 2.0 wallet. - Click your NULS icon to open your NULS wallet.
- It may take 30-60 seconds to open, but it will open in a browser window.
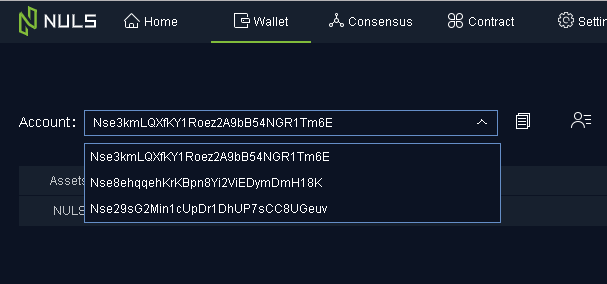
- Click on the Wallet tab and ensure your accounts are listed under the "Account" drop down box
- Click the
 Icon next to the "Account" drop down box, and make a note of each address using a notepad application of your choice Icon next to the "Account" drop down box, and make a note of each address using a notepad application of your choice
| |
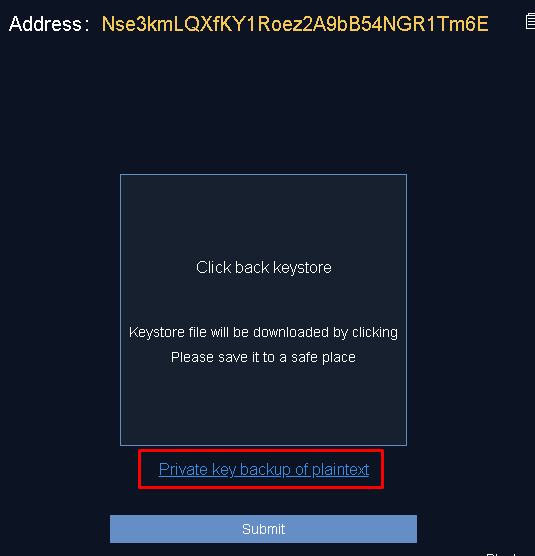
Back up your private keys Follow these steps for each address you noted down in the previous step! - Click the "Backup" link next to the account you wish to back up
- Enter your password for your wallet
- Click the "Private key backup of plaintext" link
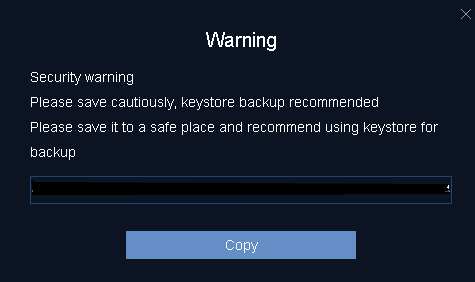
- In the box that appears, click the "Copy" button to copy your private key to your clipboard.
- Go to your notepad where you noted down your address, and paste it next to your address.
- Close the popup window displaying your private key and click the "< Account" link at the top of the window to return to the previous page
- Repeat these steps for each address in your account list.
- Close your NULS 1.0 wallet. You will no longer need it, and can delete it at this point (but it might not be a bad idea to keep it around until you're completely up and running with your 2.0 wallet!)
| |
Phase 2 - Backing up your NULS 1.0 Packing Address (optional)
If you also operate a NULS Agent Node, follow these steps to back up your NULS 1.0 packing address. This is optional, as you can technically just make a new packing address for your 2.0 node.
| Step | Image |
|---|
Agent Node Operators - Backing up your packing address key (Optional)
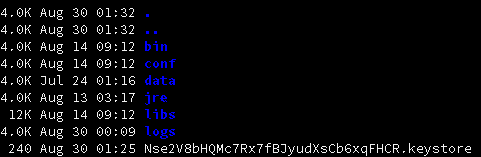
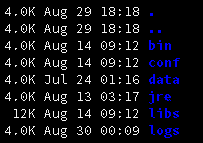
- Log into your NULS Agent Node server via ssh and navigate to your NULS software folder. It should have the following folders: bin, conf, data, jre, libs, logs.
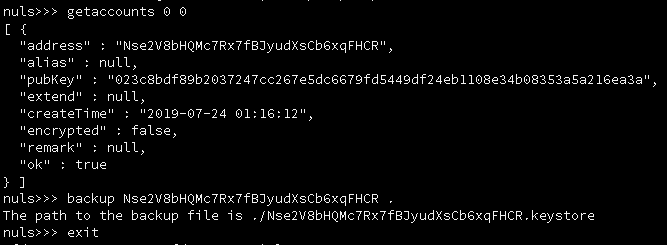
Type the following command to open your NULS console - Type "getaccounts 0 0" to list your accounts on your node. Typically, there will only be one - your packing address. Copy the "address" field and save it on your notepad
Type the following command to back up your private key, where ADDRESS is the address you copied in the previous step - Type "exit" to leave the command line. You should be returned to your directory where your bin, conf, data etc folders are located.
- Type "ls" to list all the files in this directory. A new file named ADDRESS.keystore will exist next to your folders.
Type "cat ADDRESS.keystore" to get the contents of your keystore. It will show a string of text like this:
{"address":"Nse2V8bHQMc7Rx7fBJyudXsCb6xqFHCR","encryptedPrivateKey":null,"alias":null,
"pubKey":"023c8bdf89b2037247cc267e5dc6679fd5449df24eb1108e34b08353a5a216ea3a",
"prikey":"YOUR_PRIVATE_KEY_HERE"}
- Your private key will be displayed in the YOUR_PRIVATE_KEY_HERE area (red in the picture on the right). Copy this string and save it to your notepad next to your address from the previous step.
| 
|
Phase 3 - Install the NULS light wallet software on your PC
This step will help you install the NULS 2.0 light wallet on your computer, which you can use to manage your NULS as well as set up an agent node. If you do not have a NULS 1.0 private key to import, you can skip the second step in this phase.
| Step | Image |
|---|
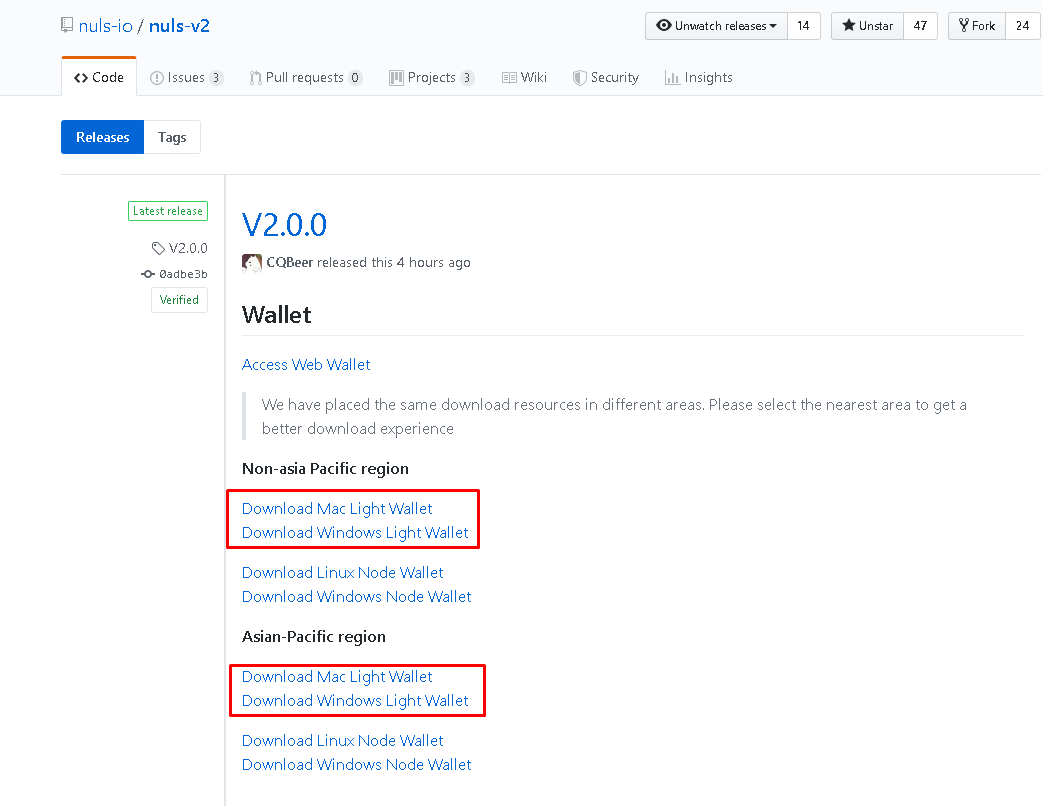
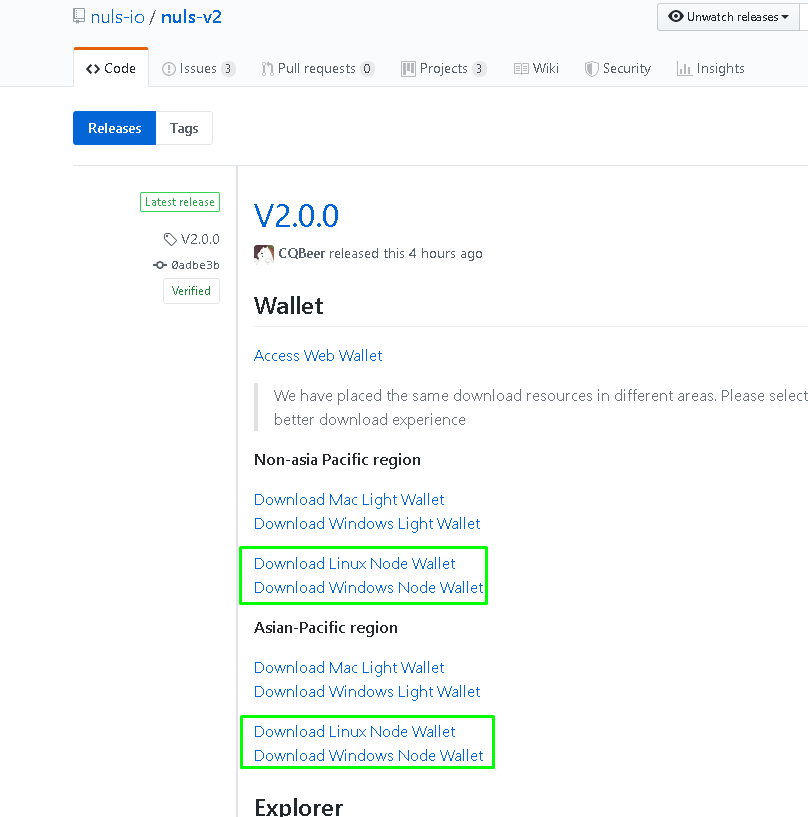
Download the NULS Wallet Software Depending on your OS, download the proper NULS light wallet for your computer. Note, the image shows "Beta" but will be updated with the release of the official 2.0 mainnet software https://github.com/nuls-io/nuls-v2/releases There is no longer a "full client" in NULS 2.0. Instead, you can install and use a "light wallet" which does not require synchronizing blocks with the network, so it's much faster and more reliable than before. - Download the appropriate software for your computer
- Double click on the installer to Install it
- Open the NULS 2.0 Wallet by clicking on the new icon
- If you cannot locate your new software icon on windows, it's located under %localappdata%\Programs\NULS-Wallet\NULS-Wallet.exe
| |
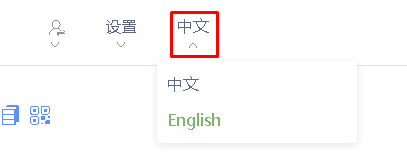
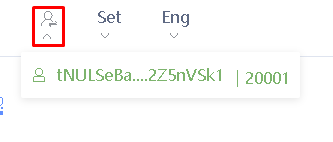
Import your Private Keys Once opened, you will initially be presented with a page where you can create a new key or import your existing one. - If necessary, change the language to english as it defaults to chinese. Click the symbol in the top right corner, then pick "English"
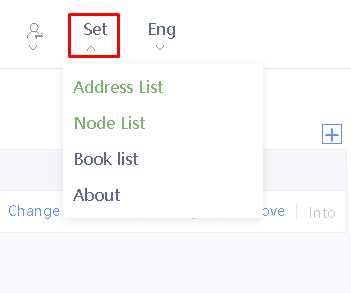
- Click "Set" and then "Address List" to see a list of addresses
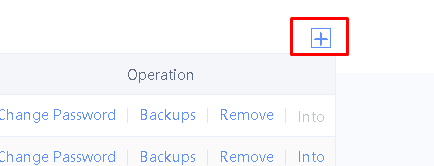
- Click the + Icon in the top right area of the "Address Management" page
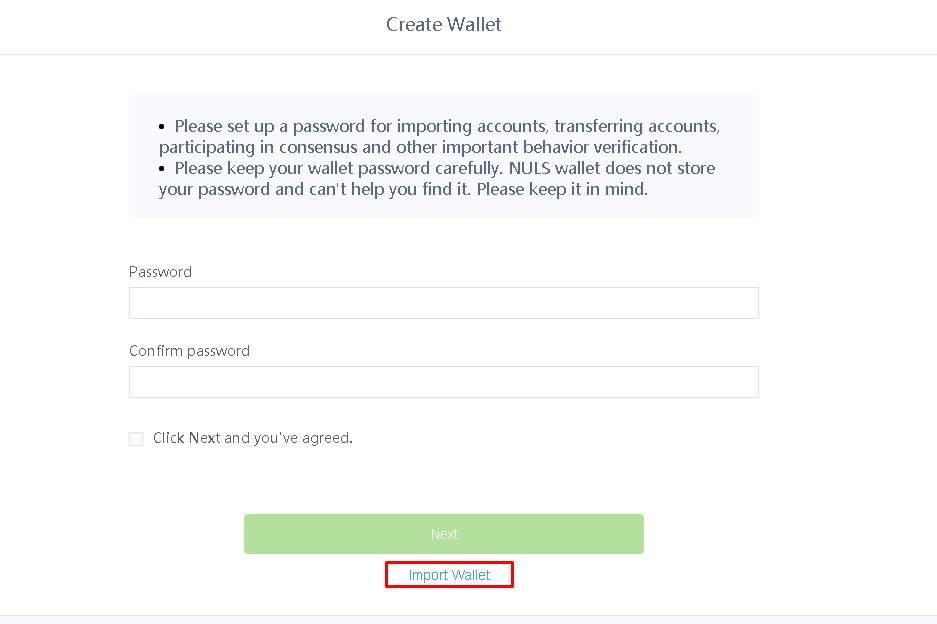
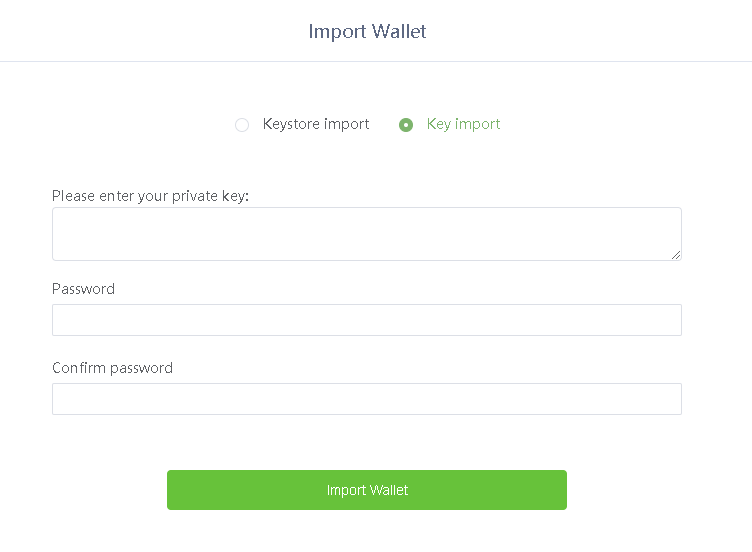
- Click "Import Wallet" at the bottom of the dialog box, then select "Key Import"
- Copy the first private key from your notepad and paste it into the first field
- Enter a new password in the Password field, and enter it again in the "Confirm password" field
- Click "Import Wallet"
- Repeat this process for each address you wish to import
If you do not run a NULS Agent node, you're done! You have successfully transferred your wallet addresses from your 1.0 NULS wallet to your 2.0 NULS wallet. | |
Phase 4 - Install the NULS agent node software
If you are hosting your node with Node Forge, you can skip this step and go straight to Phase 5. If you previously operated a NULS 1.0 Agent Node outside of Node Forge, follow these steps to set up a NULS 2.0 Agent Node on your own server. These instructions are for using a ubuntu linux server, but the steps are similar for other flavors of linux and windows. If you did not previously run a NULS 1.0 agent node, or you do not care to import your NULS 1.0 packing key, you can skip the step about importing your NULS 1.0 private key, and instead create a new packing address - both options are shown below.
| Step | Image |
|---|
Download and extract the NULS 2.0 software You can most likely use your previous NULS 1.0 server as long as it meets the system requirements for NULS 2.0. If you need a server, we recommend using Digital Ocean. - 4 Cores
- 16GB RAM
- 100GB SSD Disk Space
- 20Mbps upllink
- CentOS 7.4/7.5
- Ubuntu 16.04/18.04 (works, but not official)
- Ports 8001 and 8002 open
You can always find the latest releases for NULS 2.0 on the official github: https://github.com/nuls-io/nuls-v2/releases
wget http://nuls-usa-west.oss-us-west-1.aliyuncs.com/2.0/NULS_Wallet_linux64_v2.0.0.tar.gz
tar -xf NULS_Wallet_beta3.2-linux.tar.gz
| |
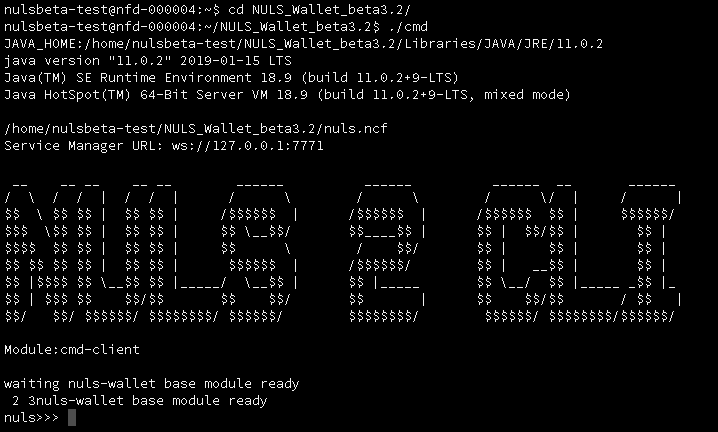
Start the node software The node software is started with the "start" application located in the root directory. It will not show anything when you start it. (If using windows, double click "start.bat")
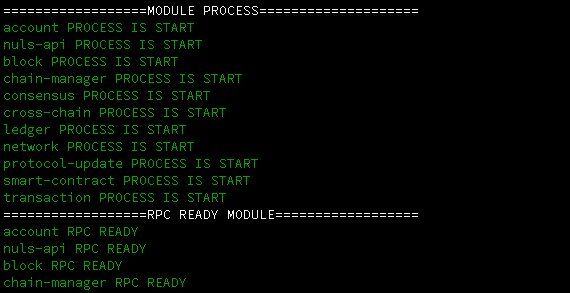
Watch the "check-status" application to make sure everything is green Open a NULS prompt with "cmd" (If using windows, double click "cmd.bat")
You'll see a "nuls>>>" prompt when the initialization is finished. | |
Import your packing address key (optional)
If you opted to back up your packing address key in prevoius steps, you can import it using the following command
import YOUR_PRIVATE_KEY_HERE
You'll be prompted to input a password and confirm it.
Display the new address created when you imported your key
Create a packing address (optional) If you did not opt to import your private key, you can instead create a new address using the "create" command You'll be prompted to input a password and confirm it.
- Your new address will be displayed after entering your password twice.
|

|
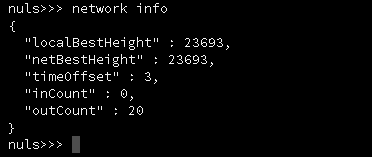
Check your block height before creating your agent Before proceeding, make sure your agent node is fully synchronized with the network Run the "network info" command at the NULS prompt to check your synchronization progress. Make sure that "localBestHeight" equals "netBestHeight", and double check it against nulscan.io.
| |
Step 5 - Create your Agent Node
If you're hosting with Node Forge, follow these steps to register your new agent node using the packing address we have provided you. If you're hosting yoru own node, follow these steps after finishing Phase 4 above and creating a packing address.
| Step | Image |
|---|
Ensure you have at least 20,000 NULS in a single address in your wallet and that your wallet is fully synced to the blockchain If your coins are located in an exchange, you're going to need a little bit (to pay for the network transaction fee) of NULS to send at least 20,000 coins to your wallet.
| |
Make a note of your Agent Address - Open your NULS "collateral" wallet (the wallet that contains all your NULS)
- Click the "Assets" tab at the top
- Pick the appropriate account from the drop down "Account:" window at the top that has your NULS in it
- Take note of this address. This is your "AGENT_ADDRESS", which will be used to set up your NULS agent node.
| |
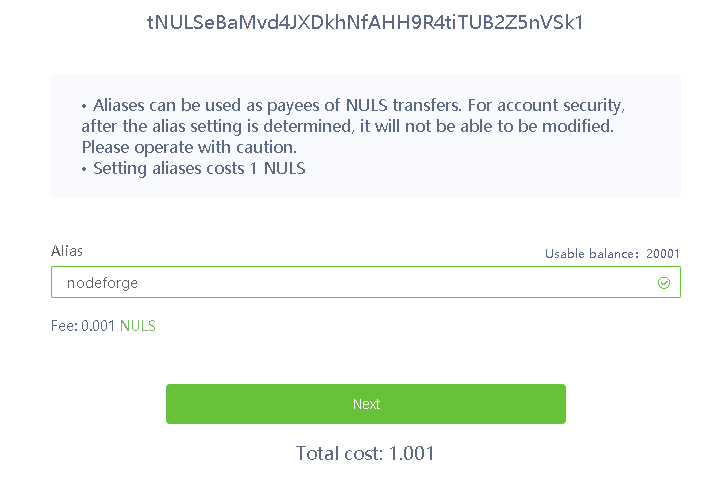
Create an Alias for your Agent Address (Optional) - If you would like your node to have a "friendly name", click on the "Set" tab at the top and pick "Address List"
- Next to your agent address with your, click the
 icon under "Alias" icon under "Alias" - Type in the name you would like in the alias field
- Click "Next" to assign your Agent Address the friendly name
- Enter your wallet password to confirm the submission
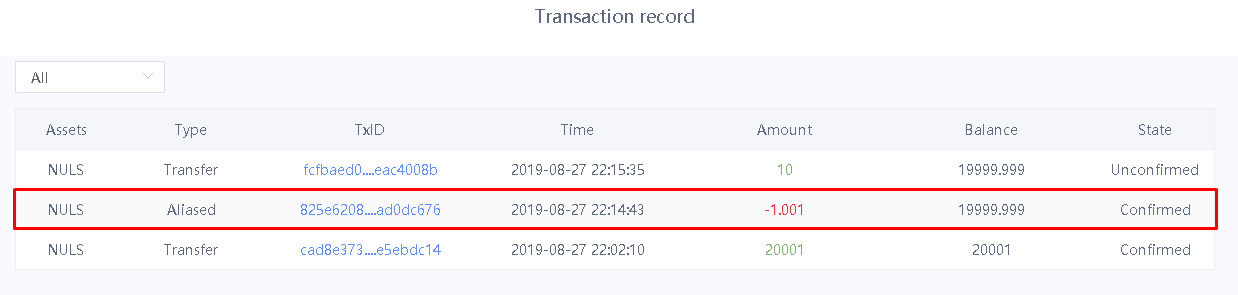
- Wait for the "Aliased" transaction on your transaction records to change state to "Confirmed"
| |
If Hosting with Node Forge, copy your Packing Address from the Node Forge Site - On Node Forge site, under the My Nodes page, expand your node, then click on the "complete setup" link.
Click the "Copy" button to copy your "PACKING_ADDRESS" to your clipboard.
If Hosting your own node, make note of your packing address from Phase 4 and proceed to the next step.
| |
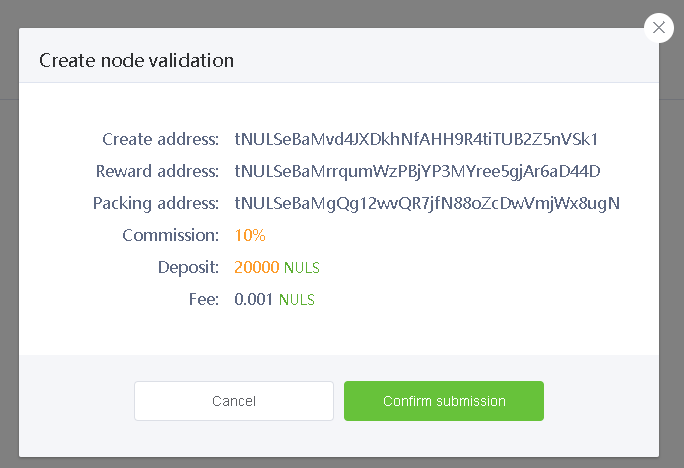
Create your Agent Node - On your NULS wallet, click the "Consensus" tab at the top
- Click the "New Node" link on the right hand side
- In the "Create address" field, ensure your "AGENT_ADDRESS" that contains your NULS is listed. If not, pick it from the
 menu in the top right. menu in the top right. - In the "Reward address" field, enter an address that you would like your rewards to go to. It can be your AGENT_ADDRESS if you prefer.
- In the "Packing address" field, paste in your "PACKING_ADDRESS" from the Node Forge site.
- In the "Deposit (NULS)" field, type in the amount of NULS you wish to "deposit" as collateral (20,000 is the minimum).
- In the Commission rate (%)" field, type in a percentage of earnings that you want to keep as commission. 10% is the minimum, and also the most common selection if you want to attract stakers.
- Click Confirm.
- If prompted for a password, enter the password for your "AGENT_ADDRESS" that you set previously
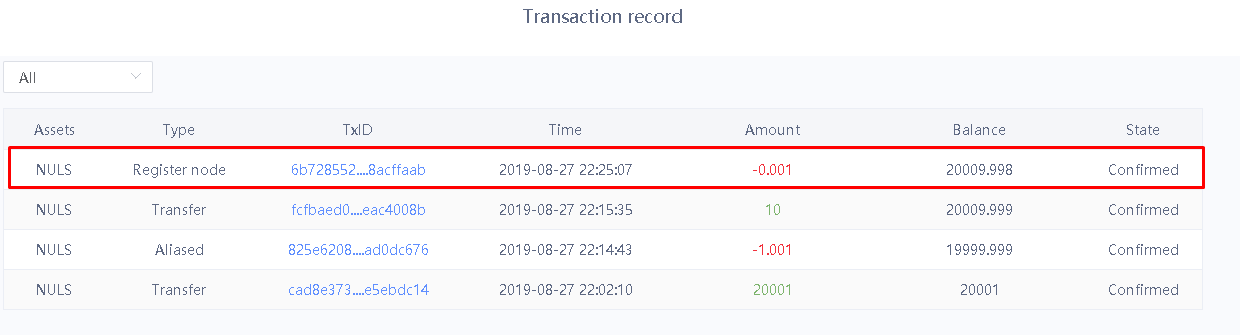
- You will be taken to the Transaction Record page. After a short time, your "Register Node" transaction should switch to "Confirmed"
| |
Click Validate on the Node Forge website - Once you have created your agent node and removed the packing address, click "Validate"
- Your node will be finalized and you'll be returned to your Node Forge dashboard. You're done setting up your node!
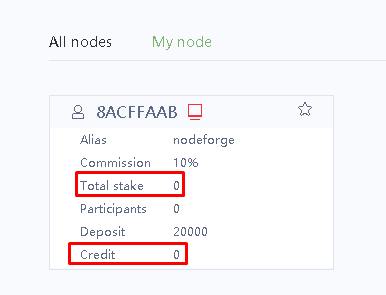
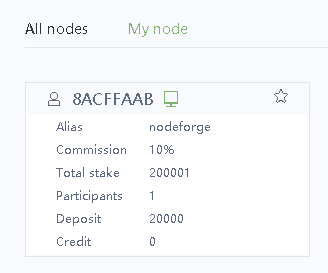
- You can view the status of your node in your NULS wallet under the Consensus tab, by clicking "My Node". After a short while, you will see its "Credit" value slowly increase from 0 to 1.
| |
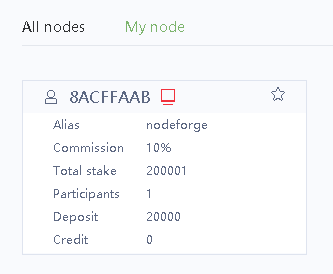
Activating your Agent Node and Joining Consensus Once your node is set up, you'll need to attract stakers in order to raise your "Total Stake" and join Consensus. You will not receive rewards until you have reached at least 200,000 Total Stake. Your node will start at 0 Credit and 0 Stake. Once you gain 200,000 or more stakers, you will see your node icon change from red to green, your credit will gradually rise from 0 to 1 by .02 every round, and you will begin to earn rewards. You can check your node's participation in the consensus by visiting http://nulscan.io/consensus and clicking on the "Consensus" tab, then clicking "Round Info". | |