Versions Compared

Key

  • This line was added.
  • This line was removed.
  • Formatting was changed.

...

StepImage

Ensure you have at least 100,001 Syscoin (SYS) in your wallet and that your wallet is fully synced to the blockchain

If your coins are located in an exchange, you're going to need a little bit (to pay for the network transaction fee) of SYS to send exactly 100,000 coins to your wallet.

Follow the steps below to do so:


Warning

NOTE: If you held SYS prior to the SYS 4.0 upgrade, be sure that you have followed the conversion before proceeding.

https://medium.com/@bittyjohn1954/syscoin-4-conversion-from-syscoin-3-1288c5027d45


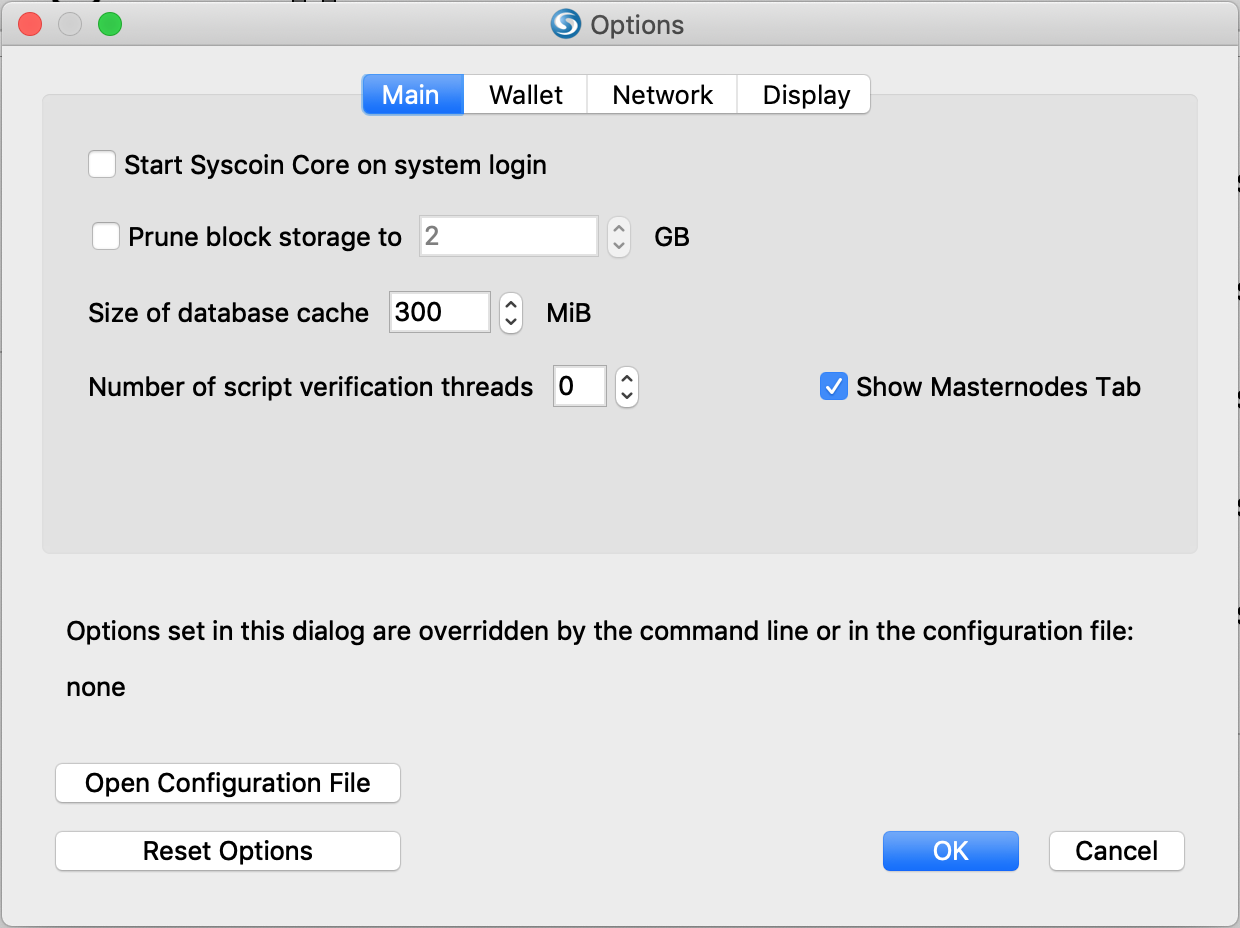
Prepare wallet for masternode setup

  1. Open your wallet and go to Settings > Options
  2. Select the Main tab and click the checkbox to "Show Masternodes Tab"
  3. Select the Wallet tab and click the checkbox to “Enable coin control features”
  4. Click OK and close your wallet
  5. Reopening your wallet will show new wallet options, specifically the Masternodes Tab
  6. Allow your wallet to fully sync to the blockchain before proceeding

Create a new Receive HD masternode address for masternode
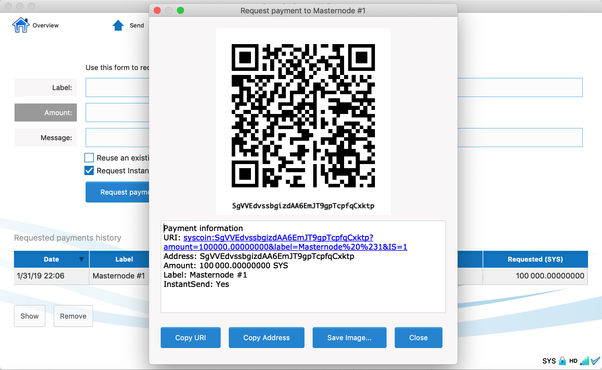
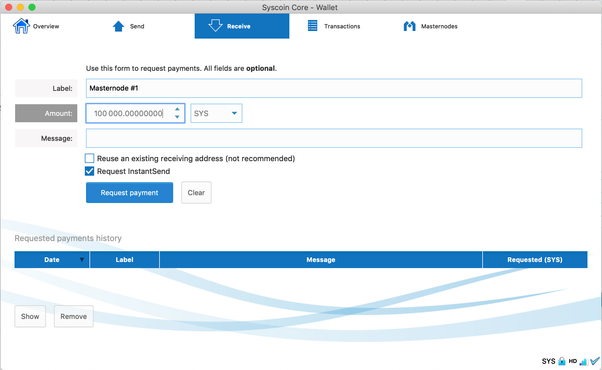
Image Removed
  1. Open your wallet to create a receiving address
  2. Click the Receive tab
  3. Type in a friendly name for the Label, such as "Masternode #1"
  4. Type 100000 for the Amount
Image Removed

Request Payment

  1. Click Request Payment. This will be the collateral address for your masternode
  1. You will need to create a new HD address. Do not reuse a Sys3 address. Be sure to use the console to generate your MN collateral address
  2. Go to Window > Console
  3. Type "getnewaddress <LABEL> legacy" (replacing <LABEL> with a name i.e. mn1), to generate an address to use for your 100,000 SYS collateral. Masternodes require legacy addresses, and will not work with the new Bech32 addresses that start with sys. Copy and note this address for later. You will need to send your collateral to this address in a later step
    • If the address starts with sys you have NOT included legacy and will need to regenerate a legacy address
    • If the address starts with ‘3’ you have not used the console


Note

If you are configuring multiple masternodes you will need to create a unique masternode private key and unique collateral address for each masternode using the steps above. Once the address is created for each masternode send a collateral transaction of exactly 100,000SYS to the address for each masternode using the next steps.


Image Added

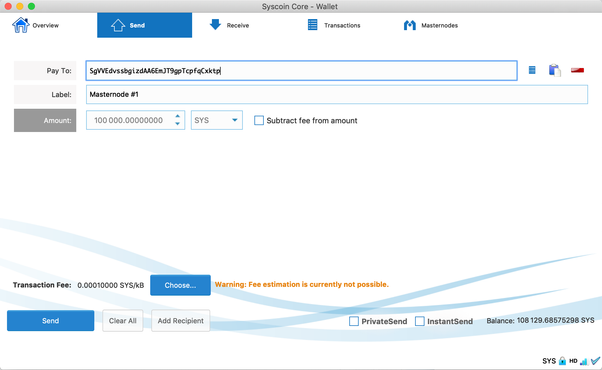
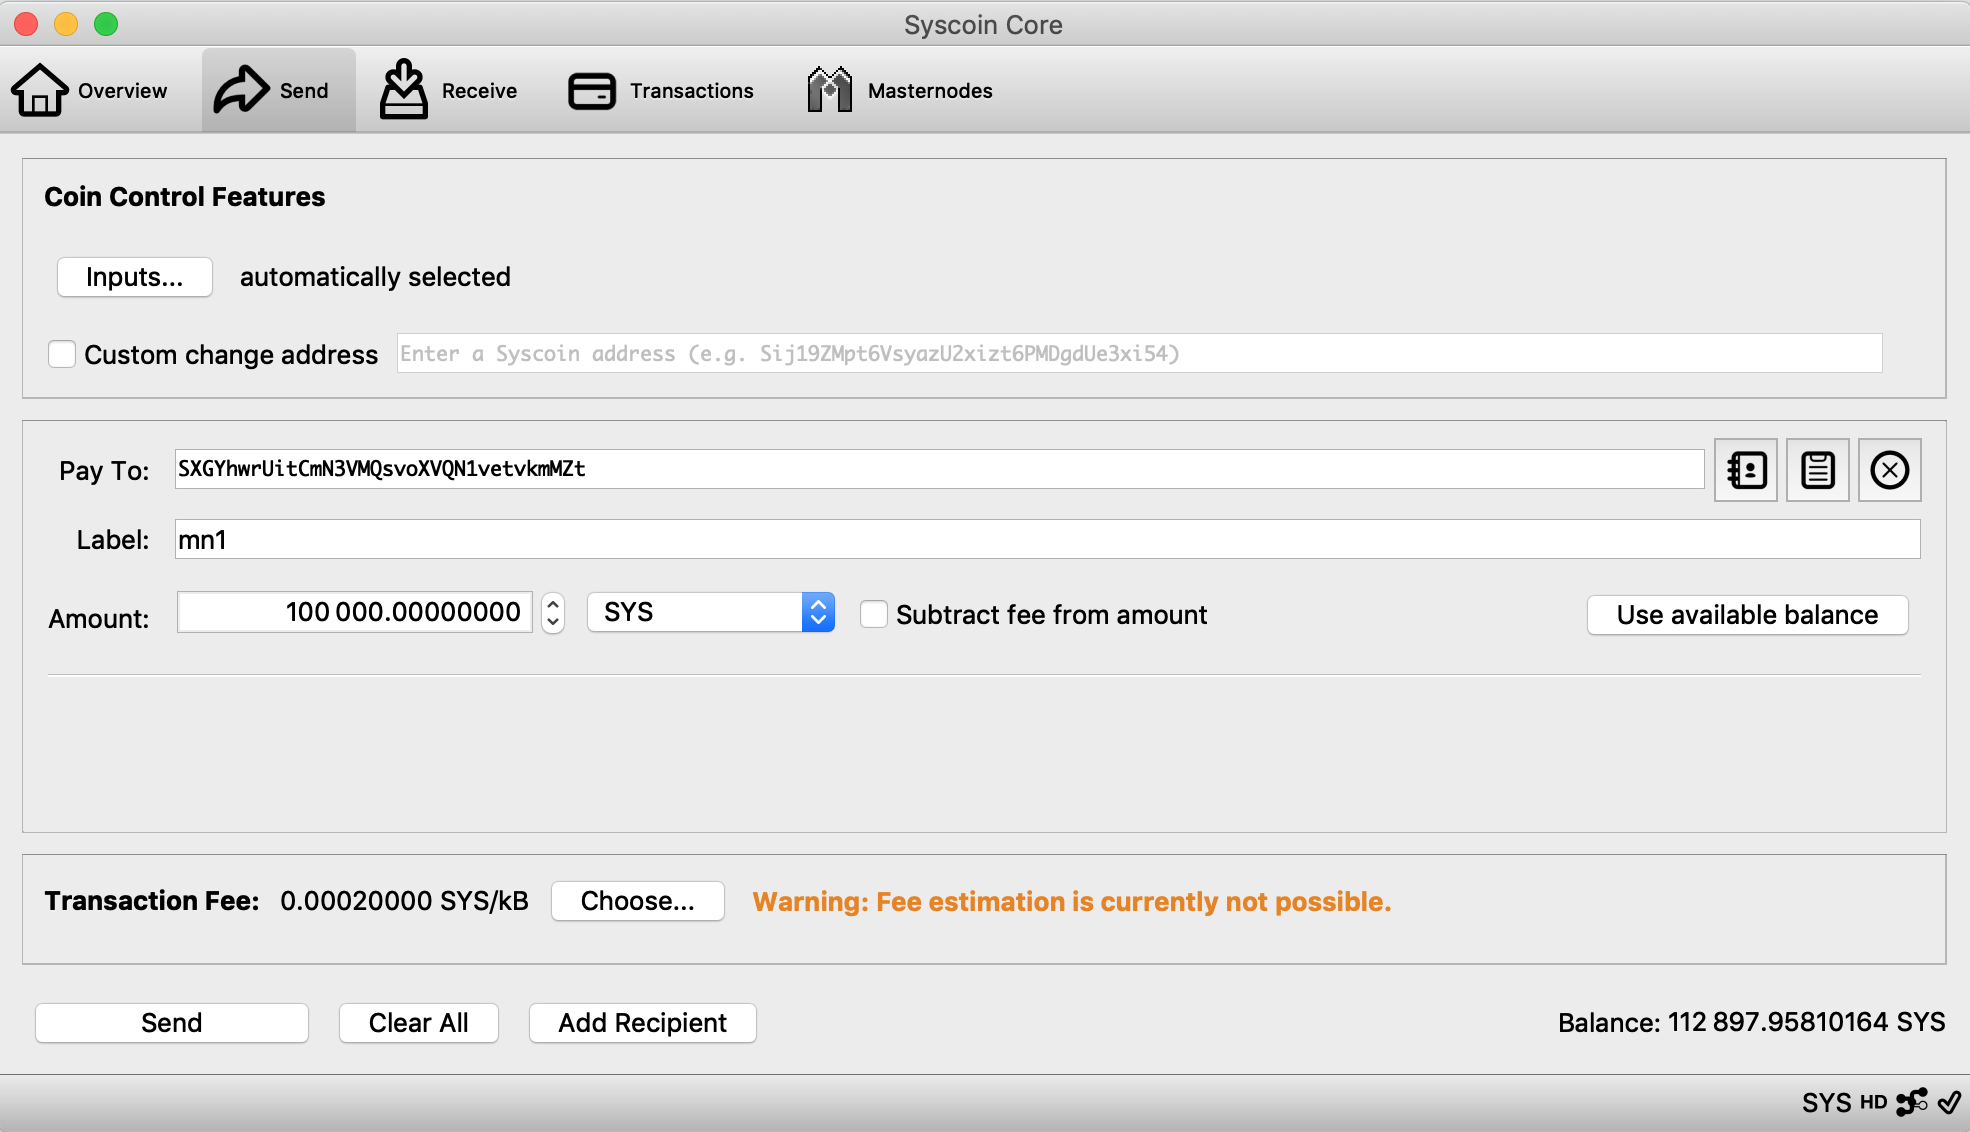
Send EXACTLY 100,000 Syscoin/SYS to the new address you created

If your SYS is already in your wallet, send 100,000 SYS to the newly formed collateral address from the Send tab

Use Coin Control to ensure that you send your collateral from the correct address

  1. Go to "Send" and then "Inputs" to select the input you would like to send from
  2. Next enter your masternode collateral address from the previous step into the “Pay To” field. Enter “100,000” exactly into the “Amount” field and do NOT subtract fees from the amount as it will reduce your collateral total.
  3. Press “Send” to send your Syscoin to your masternode collateral address. You will need to wait 1 block — approximately 1 minute — for the transaction to confirm.

Click Send to send to submit the send transaction

  • Click Yes to accept the fee.

  • Image RemovedImage Added

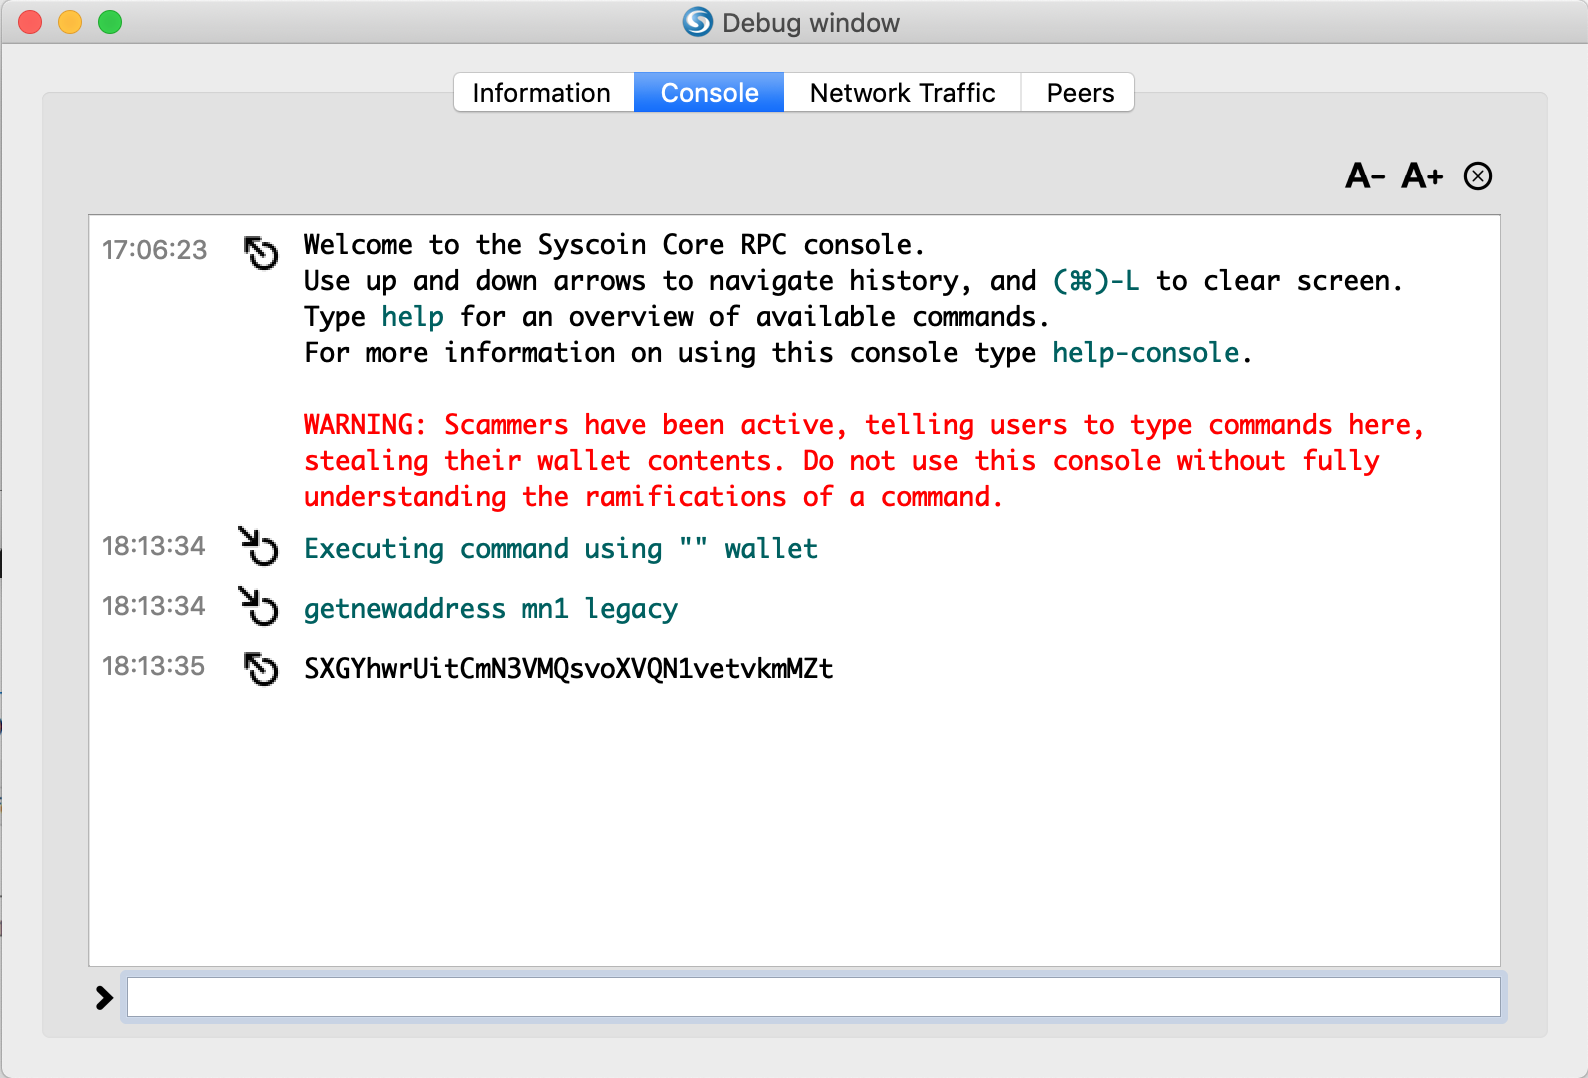
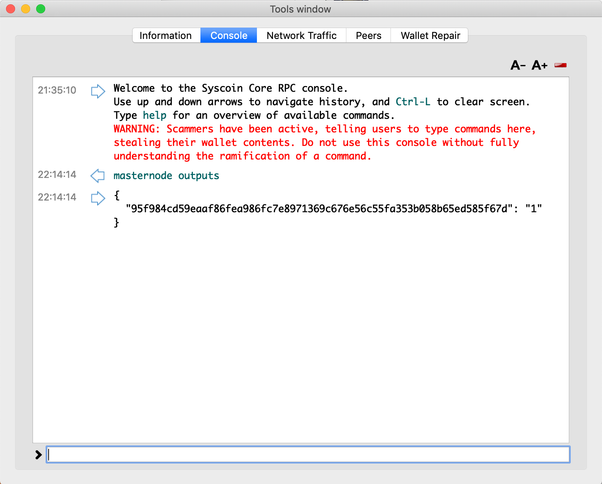
    Get the Masternode transaction ID from the debug window

    Go to

    Tools

    Window >

    Debug console

    Console

    1. Type in "Masternode Outputs" and press enter
    2. Copy the tx hash (which is the string in the first set of quotes)
    3. Write down outputidx down (which is the single digit in the second set of quotes)

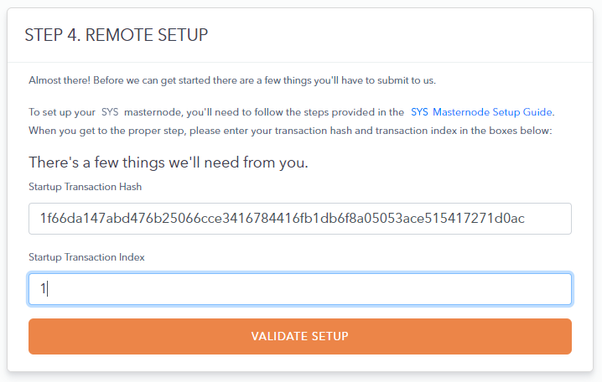
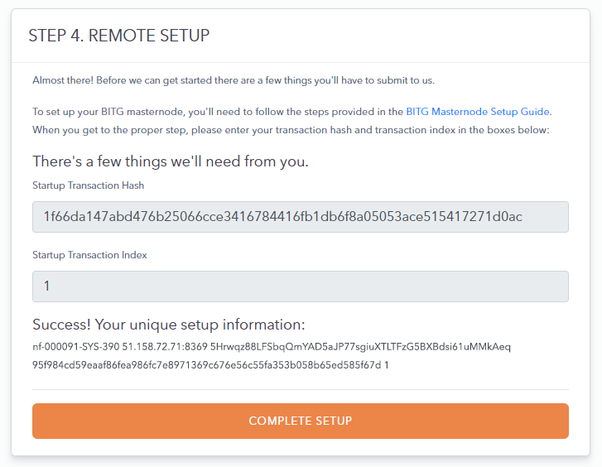
    Transfer Transaction Hash and Index to Node Forge Setup

    Once you get through Step 1-3 in "Creating a Masternode" on the Node Forge Platform. On Step 4, perform the following:

    1. Paste txhash from Debug console into the "Startup Transaction Hash" field on the Node Forge screen
    2. Paste outputidx from Debug console into "Startup Transaction Index" field on the Node Forge screen
    3. Click Validate Setup (May take up to 30-60 seconds)
    4. Once successful, copy the entire "Unique Setup Information" string displayed (to be used in the next step)

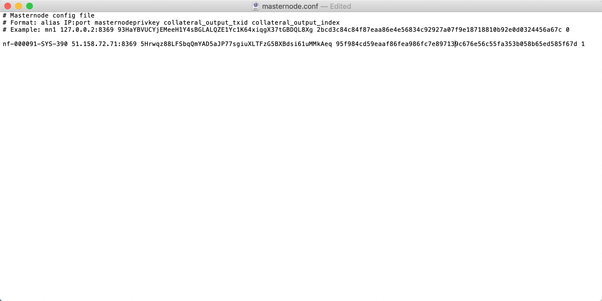
    Modify the Masternode Configuration File (masternode.conf)

    1. Go to Tools > Masternode Configuration File, this should open up a Textedit (on Mac) or Notepad (on PC) file
    2. Paste the "Unique Setup Information" (from the previous step), save and close


    If a textedit (on Mac) does not open by default when you select Master Configuration File from the menu, you'll have to open the file manually from Finder

    1. Close the Wallet
    2. Open Finder > Go > Hold option on your keyboard (Library will show up) > Library
    3. Open the Application Support folder
    4. Open SyscoinCore folder
    5. Open masternode.conf with TextEdit
    6. Paste unique setup information (from the previous step), save, and close

    Restart your Wallet

    1. Close and re-open your wallet.
    2. Click the Masternodes tab and your node should now populate (after approximately 15-20 confirmations).
    3. Click Update Status to refresh the list if it is not populating

    Image RemovedImage Added

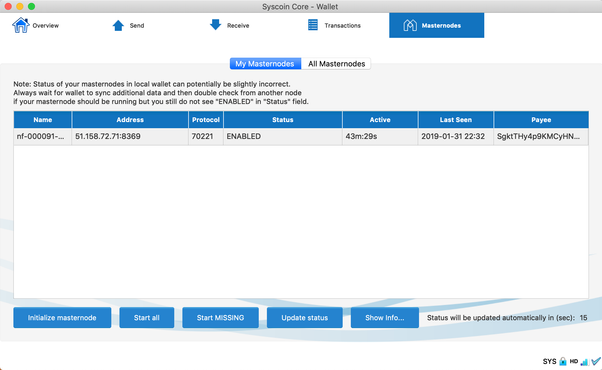
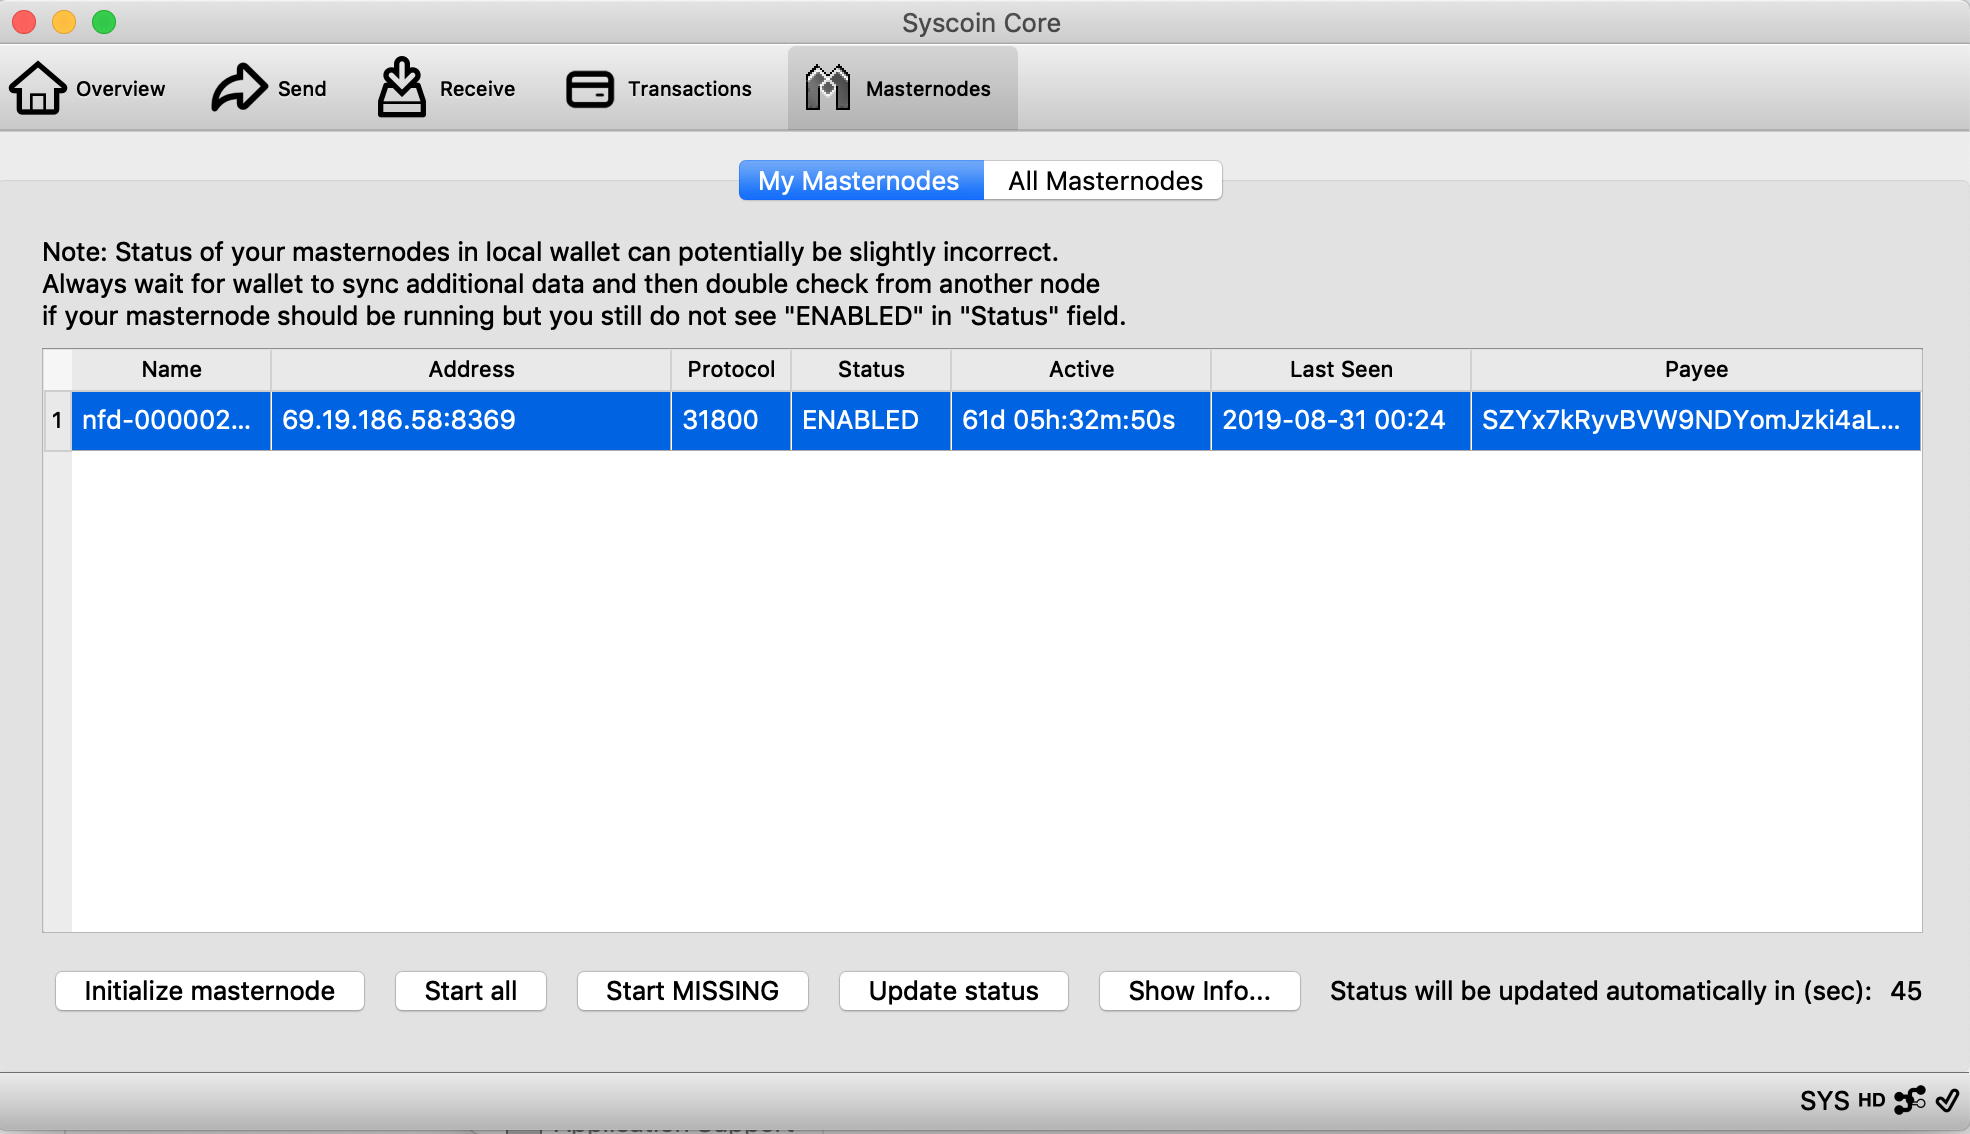
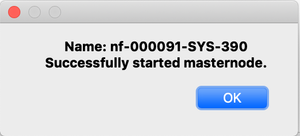
    Start the remote masternodes via the wallet

    1. Navigating back to your SYS wallet, select the Masternodes tab
    2. Click Start alias
    3. Click Yes to Prompt "Are you sure you want to start all masternodes?"

    If all was done correctly, you should get a popup indicating "Successfully Started"