If prospective operators need additional support on this guide, drop us a line in the Technical Support channel in our Discord.
| Info |
|---|
Step and screenshots of this setup are pulled from the official XinFin Masternode Guide found here: XinFin Masternode Setup Guide |
NOTE: There are two sets of directions below. Please follow the proper guide, based on whether you are creating a new XinFin Masternode for the first time, or migrating an existing XinFin Masternode to our platform:
...
# | Steps | Images |
|---|---|---|
1 | Log into the Node Forge website and click “Create a Masternode.” Select the “XinFin” node from the dropdown list and click the “Create A Node” button. Once you complete the purchase of the node, it will be automatically set up, and you will receive an email once node setup is completed which will prompt you to return to your Node Forge account and complete the setup of your node. |   |
2 | When prompted to complete your setup, you should be left off on “Step 4. Remote Setup.” Select “Create a New Node”. |  |
3 | Copy the Coinbase address for the node from the Node Forge Dashboard. |  |
4 | Go to XinFin masternode site: https://xinfin.network/#masternode and log in. |  |
5 | Follow steps to log in using wallet that has the 10 million XDC in it. |  |
6 | Register/Upload KYC as directed by the XinFin project. |  |
7 | Specify 10 million XDC and provide the Coinbase address from the Node Forge Dashboard, click Apply. |  |
8 | Your node will be added as standby. Once promoted to an active node, you will begin receiving rewards. You can see your standby node at the masternode tab here: https://xinfin.network/#masternode |  |
9 | Click “Validate Setup” from your Node Forge dashboard to complete your setup. |  |
...
# | Steps | Images |
|---|---|---|
1 | Obtain your current coinbase.txt and keystore contents from your existing node or hosting provider. These steps will vary depending on where your existing node is located. If you are hosting your node yourself, these files will be located under ~/XinFin-Node/xdcchain/coinbase.txt and ~/XinFin-Node/xdcchain/keystore/UTC-xxxxxxx…. Open these files with a text editor such as vim, and copy down the contents. They will be used in later steps. | 
|
2 | Log into the Node Forge website and click “Create a Masternode.” Select the “XinFin” node from the dropdown list and click the “Create A Node” button. Once you complete the purchase of the node, it will be automatically set up, and you will receive an email once node setup is completed which will prompt you to return to your Node Forge account and complete the setup of your node. |  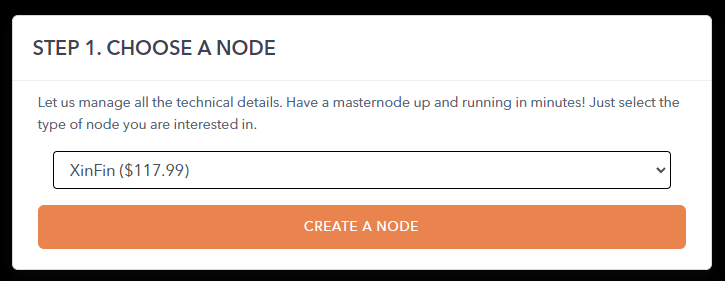 |
3 | When prompted to complete your setup, you should be left off on “Step 4. Remote Setup.” Select “Import an Existing Node”. | 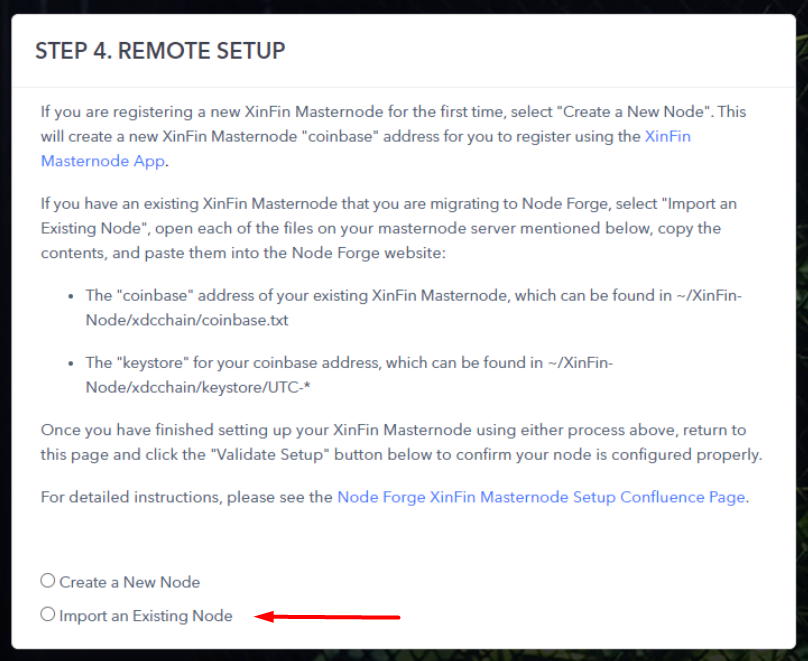 |
4 | Supply the contents of the Coinbase and Keystore Files in the appropriate boxes. | 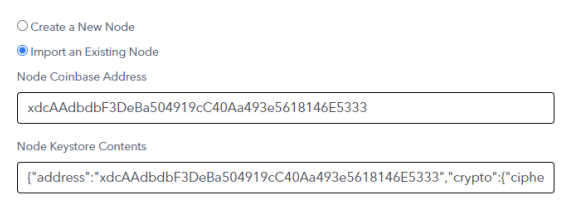 |
5 | Click “Validate Setup” from your Node Forge dashboard to complete your setup. | |
...